Blazor Bindings By Example - Part 1
Creating a project to explore ways to bind a model to the UI


Introduction
As a mechanism to explore the different ways bindings work in Blazor, we are going to create a Blazor WebAssembly project in Visual Studio 2022 with a demo model that has enough properties on it to lend itself to a variety of binding styles.
All the code for this series is available from GitHub.
Visual Studio WebAssembly Project
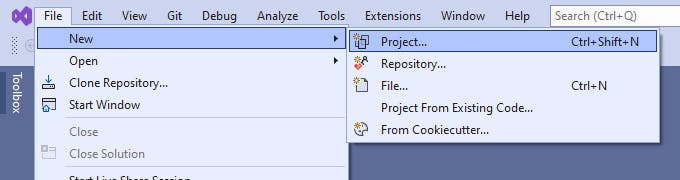
First up, we'll need to create a new Visual Studio project using the WebAssembly App template for C#. Open Visual Studio and from the application menu select File | New | Project....
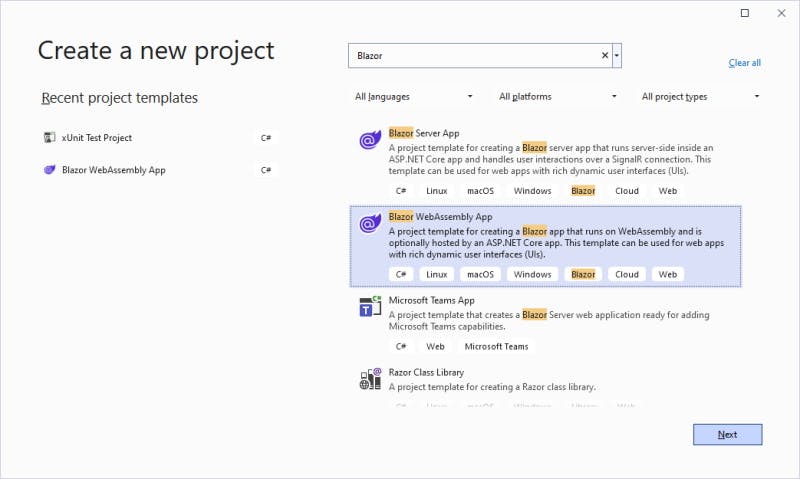
In the wizard dialog that opens, search for the word Blazor and select the project Blazor WebAssembly App (C#) then click Next.
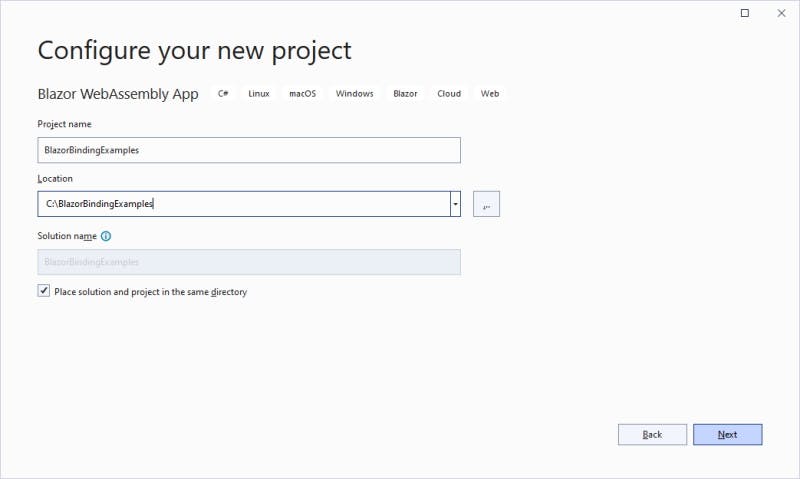
On the next screen enter a project name and a location to save it to, in my case I called the project BlazorBindingExamples and saved it to C:\BlazorBindingExamples then click Next. I left the checkbox checked for Place solution and project in the same location.
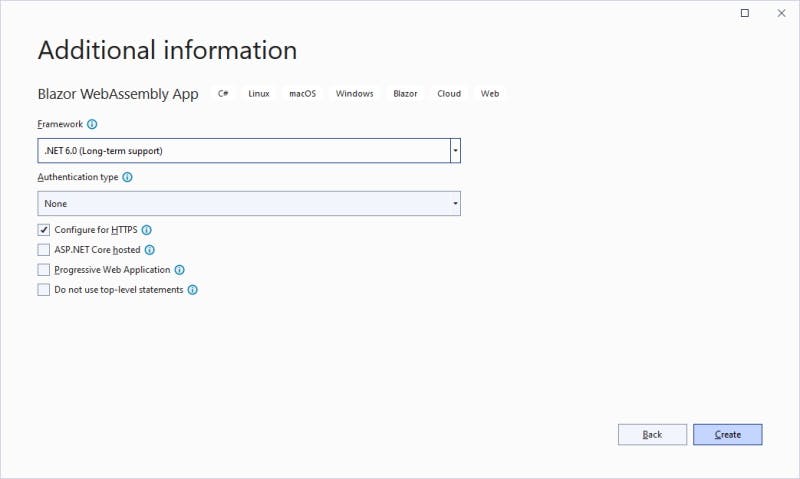
On the next screen leave everything at the default; Framework of .NET Core 6.0, no authentication and support for HTTPS then click Create.
Remove Unwanted Content
The resulting project runs, but contains some demonstration content, so next up we'll delete the unwanted content but broadly keep the layout of a left navigation area and a main area.
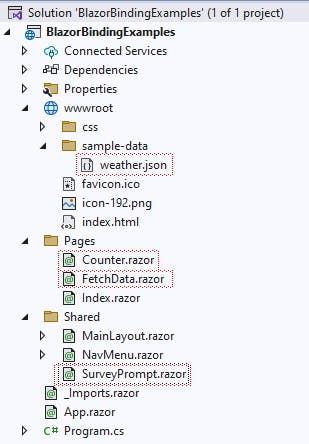
Firstly remove all the following files (locations are relative to the root of the project):
- Pages/Counter.razor
- Pages/FetchData.razor
- Shared/SurveyPrompt.razor
- wwwroot/sample-data/weather.json
Having removed that content, we need to fix a few files up.
Pages/Index.razor
1) Change its PageTitle element content from "Title" to "Blazor Bindings By Example"
<PageTitle>Index</PageTitle>
to
<PageTitle>Blazor Bindings By Example</PageTitle>
2) Delete the SurveyPrompt element
<SurveyPrompt Title="How is Blazor working for you?" />
Shared/MainLayout.razor
1) Delete the "About" div element from within the main element
<div class="top-row px-4">
    <a href="https://docs.microsoft.com/aspnet/" target="_blank">About</a>
</div>
Shared/NavMenu.razor
1) Change the Title element content from "BlazorBindingExamples" to "Blazor Bindings By Example"
<a class="navbar-brand" href="">BlazorBindingExamples</a>
to
<a class="navbar-brand" href="">Blazor Bindings By Example</a>
2) Delete the "Counter" and "Fetch Data" navigation links
<div class="nav-item px-3">
    <NavLink class="nav-link" href="counter">
        <span class="oi oi-plus" aria-hidden="true"></span> Counter
    </NavLink>
</div>
<div class="nav-item px-3">
    <NavLink class="nav-link" href="fetchdata">
        <span class="oi oi-list-rich" aria-hidden="true"></span> Fetch data
    </NavLink>
</div>
wwwroot/index.html
1) Change the Title element content from "BlazorBindingExamples" to "Blazor Bindings By Example"
<title>BlazorBindingExamples</title>
to
<title>Blazor Bindings By Example</title>
Run New Blazor WebAssembly Application
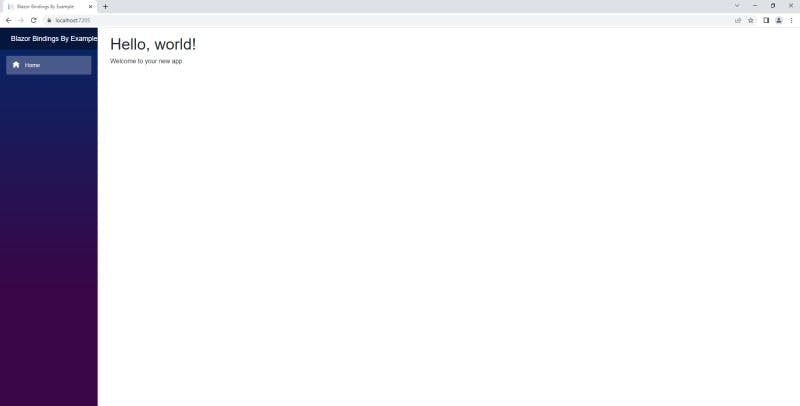
You can now run the new Blazor WebAssembly Application project and you will see an broadly empty application with a single menu on the left called "Home" and "Hello World" placeholder content on the right.
Refactor Index.razor To Have a Separate Code Behind File
I personally do not like to see 'code behind' (viewmodel) in the same file as the html markup (view), so we will separate them into separate files. Currently the Index.razor page (view) does not have any code behind (viewmodel) so we will create a file ready to receive this.
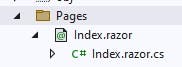
Within the "Pages" folder create a new class called Index.razor.cs. This naming convention of naming the class the same as its associated razor file, but with a .cs extension will nest the class (viewmodel) under the razor file (view).
One tweak we must make is to change the class definition to be partial and to derive from ComponentBase, which will require the inclusion of using statement for Microsoft.AspNetCore.Components as shown below:
using Microsoft.AspNetCore.Components;

namespace BlazorBindingExamples.Pages
{
    public partial class Index : ComponentBase
    {
    }
}
Add External Data
We need to add some external data to the application, to allow us to populate a dropdown list of countries.
Countries Sample Data
Download the data we will use from Datahub, specifically:
Extract the contained file (data/data_json.json) and place it in the project folder "wwwroot/sample-data". Rename the file to countries.json.
Country Class To Deserialize Data Into
Create a project folder called Models and create a class within the folder called Country.cs with two 'string' properties, Name and Code, as shown below.
namespace BlazorBindingExamples.Models
{
    public class Country
    {
        public Country(string name, string code)
        {
            Name = name;
            Code = code;
        }

        public string Name { get; init; }
        public string Code { get; init; }
    }
}
Load Country Data
The project template already included the necessary setup within Program.cs to use HttpClient so all we need to do is inject it into the Index page. We then use this HttpClient to load the data into a property called Countries during the Index page initialization. We do this by adding the logic to an override of the OnInitializedAsync protected method. Note that this brings in some further namespaces.
using Microsoft.AspNetCore.Components;
using System.Net.Http.Json;

namespace BlazorBindingExamples.Pages
{
    public partial class Index : ComponentBase
    {
        [Inject]
        private HttpClient Http { get; init; }
        public IReadOnlyList<Country> Countries { get; private set; }

        protected override async Task OnInitializedAsync()
        {
            Country[]? countries = await Http.GetFromJsonAsync<Country[]>("sample-data/countries.json");
            Countries = countries ?? Array.Empty<Country>();

            await base.OnInitializedAsync();
        }
    }
}
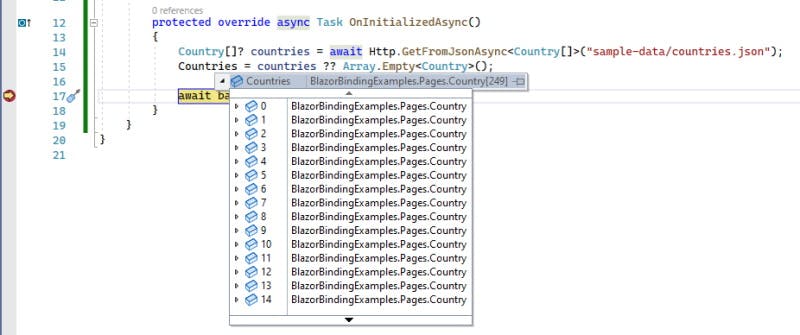
You can check this is loading correctly by placing a breakpoint within the OnInitializedAsync method and observing that the Countries property now has a populated list of Country objects.
Add Our Model
For the purposes of demonstrating a variety of binding options we will provide a model that has a number of different property types:
- Identity: readonly Guid
- Name: editable string
- Gender: single select enum value
- Nationality: single select list value (Country Code)
- Age: editable integer
- Salary: editable decimal as a currency
- MarketingOptions: multiple select enum value
First we must add the two enumerations we plan to use; Gender and MarketingOption. Add two files to the Models folder, Gender.cs and MarketingOption.cs, defined as follows:
namespace BlazorBindingExamples.Models
{
    public enum Gender
    {
        Undefined = 0,
        Female,
        Male
    }
}
and
namespace BlazorBindingExamples.Models
{
    [Flags]
    public enum MarketingOption
    {
        None = 0,
        Post = 1,
        Email = 2,
        Text = 4
    }
}
Now we can create our Model class within the "Models" folder called Model.cs like this:
namespace BlazorBindingExamples.Models
{
    public class Model
    {
        public Model(Guid id)
        {
            Id = id;
        }

        public Guid Id { get; init; }
        public string? Name { get; set; }
        public Gender? Gender { get; set; }
        public string? Nationality { get; set; }
        public int? Age { get; set; }
        public decimal? Salary { get; set; }
        public MarketingOption? MarketingOptions { get; set; }
    }
}
The Model can now be added to the Index viewmodel, loading an initial empty/new Model as part of OnInitializedAsync, making the final Index.razor.cs look like this:
using BlazorBindingExamples.Models;
using Microsoft.AspNetCore.Components;
using System.Net.Http.Json;

namespace BlazorBindingExamples.Pages
{
    public partial class Index : ComponentBase
    {
        [Inject]
        private HttpClient Http { get; init; }

        public bool Initialised { get; set; } = false;
        public Model Model { get; private set; }
        public IReadOnlyList<Country> Countries { get; private set; }

        protected override async Task OnInitializedAsync()
        {
            Model = new(Guid.NewGuid());

            Country[]? countries = await Http.GetFromJsonAsync<Country[]>("sample-data/countries.json");
            Countries = countries ?? Array.Empty<Country>();

            await base.OnInitializedAsync();

            // Set this when fully initialised as we use this to prevent premature rendering
            Initialised = true;
        }
    }
}
Note this inclusion of the property Initialised - we'll talk about that when we add the content to the Index page.
Index Content
The content of the index page can now be changed form the "Hello World" placeholder content to something describing the above.
We haven't really gotten to the bindings yet, so here's my Index content, which gives a first peek at a binding.
@page "/"

<PageTitle>Blazor Bindings By Example</PageTitle>

<h1>Blazor Example Bindings</h1>

@if (!Initialised)
{
    <p>Loading...</p>
}
else
{
    <p>To demonstrate bindings in Blazor we will need a model to bind to that has enough properties on it to allow us to exercise a variety of options.</p>

    <h2>Model</h2>

    <p>Our model will be as follows:</p>

    <ul>
        <li>Id (demonstrate readonly value)</li>
        <li>Name (demonstrate editable text field)</li>
        <li>Gender (demonstrate radios)</li>
        <li>Nationality (demonstrate list)</li>
        <li>Age (demonstrate editable number field)</li>
        <li>Salary (demonstrate editable currency field)</li>
        <li>MarketingOptions (demonstrate checkboxes)</li>
    </ul>

    <p>The ViewModel will contain a reference to the above Model plus any external data or supporting fields the UI needs:</p>
    <ul>
        <li>Countries</li>
    </ul>

    <p>Here is a simple output of the above using bindings:</p>
    <ul>
        <li>Id = @Model.Id</li>
        <li>Name = @Model.Name</li>
        <li>Gender = @Model.Gender</li>
        <li>Nationality = @Model.Nationality</li>
        <li>Age = @Model.Age</li>
        <li>Salary = @Model.Salary</li>
        <li>MarketingOptions = @Model.MarketingOptions</li>
    </ul>

    <p>Countries are:</p>
    <ul>
        @foreach (var country in Countries)
        {
            <li>@country.Name (@country.Code)</li>
        }
    </ul>
}
Our Index viewmodel has three properties; Model, Countries and Initialised. As this viewmodel is directly tied to the html view, this properties are directly visible/available to the view and can be referred to using the @propertyname syntax.
For example, the Id of the Model can be referred to as @Model.Id anywhere within the text of a paragraph or list item.
The Countries property is a list and therefore we can use a @foreach to enumerate over each of the values, creating a list item for each one using @country.Name and @country.Code.
There is also the Initialised property. Initially I didn't include this, however as I created the content for the Index page, I found that the page renders twice; once after the component has been created and because we are using OnInitializedAsync again at the end of that routine. At the time of the first render, we haven't yet managed to initialse the Countries property and therefore we get a null exception, so I needed to prevent the bindings trying to process the Countries property until it was ready.
Perhaps we could instead of used the synchronous version OnInitialized but instead I chose to set a flag when I knew all the data was initialized and used that to control when the bindings should take place. I then use this flag in an @if/else to display a message of 'Loading...' or process the properties once initialized.
Summary
In this article, the first article in the series "Blazor Bindings By Example", we have created our first Blazor WebAssembly Application, stripped out some of the 'template noise' and refactored the existing Index page 'view' and added to it our own code behind 'viewmodel' complete with some external data (Countries) and a Model of our own.
We have not yet properly examined Blazor bindings, although we did have a first peek at the simplest of all bindings @propertyname and a little bit of structural logic via @if/else and @foreach.
In the next article, we will get more into the different ways in which we might choose to bind our the Name property of our 'viewmodel' to the 'view'.